


DIY Candle Making: How to Create Your Own Candles at Home
Home made candles are a fantastic way to personalize your space with unique scents and aesthetics. To quickly get started, here's a simple overview of the steps:
- Melt wax in a double boiler.
- Add fragrance and dye to the melted wax.
- Secure wicks in your chosen containers.
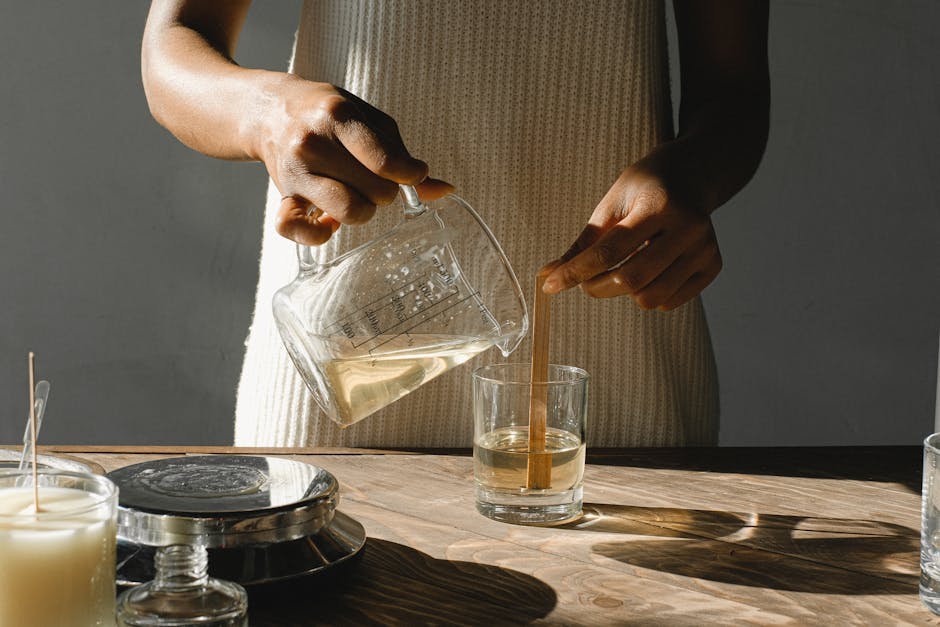
- Pour the wax into the containers.
- Let the candles cool and set before using.
Crafting your own candles is not only fun but also allows you to experiment with various designs, fragrances, and wax types. This process can be a cozy and relaxing hobby, perfect for enhancing your reading nook with a warm glow and delightful scents.
Benefits of Home Made Candles - Personalization: Tailor the scent, color, and design. - Cost-effective: Often cheaper than store-bought candles. - Quality Control: Use natural wax and essential oils. - Eco-friendly: Reduce waste by upcycling containers.
I'm the co-founder of Frostbeard Studio, and I've been making home made candles since 2012. My journey started with a small pottery business and grew into a best-selling candle brand focused on literary-inspired scents. Now, let's dive into the essential supplies you'll need to make your own home made candles!

Essential Supplies for Homemade Candles
To make your own home made candles, you'll need a few essential supplies. Let's break them down:
Wax Types
Choosing the right wax is crucial. Here are your main options:
- Soy Wax: A natural, renewable resource that burns cleanly. It holds fragrance well and is easy to work with. A 5-lb bag of soy flakes costs about $20 and can make multiple candles.
- Beeswax: Another natural option with a subtle honey scent. It's more expensive but burns longer. A 16-ounce bag of beeswax pellets costs around $13.
- Paraffin Wax: Common but derived from petroleum. Not the best for air quality.
Wicks
The wick is the heart of your candle. Here are two good choices:
- Cotton Wicks: Natural and biodegradable. They don't release harmful chemicals.
- Wooden Wicks: Sustainable and create a soothing crackling sound. They burn evenly, reducing waste.
Tip: Choose a wick appropriate for your wax type and container size to ensure a consistent burn.
Containers
Your container holds the wax and wick. Popular choices include:
- Glass Jars: Durable and reusable. You can use mason jars, old candle jars, or even thrifted tea cups.
- Metal Tins: Lightweight and portable. Great for travel candles.
- Ceramic Containers: Stylish but ensure they are heat-resistant.
Pro Tip: Reuse old candle jars by freezing them to remove leftover wax and wick.
Fragrance Oils and Essential Oils
Adding scent to your candles makes them unique:
- Essential Oils: Natural and therapeutic. Use about 60 drops for an 8-ounce candle. Popular choices include lavender, eucalyptus, and peppermint.
- Fragrance Oils: Synthetic but provide a stronger scent. Follow the manufacturer's recommended dosage.
Dyes
Coloring your candles can add a personal touch:
- Candle Dye: Available in liquid, chip, or block form. Add a small amount to melted wax.
- Crayons: In a pinch, remove the paper wrapping and melt them into the wax. They work but aren't as reliable as candle dye.
Double Boiler
Melting wax safely is essential. A double boiler prevents overheating:
- Setup: Fill a larger pot with water and place a smaller pot or a dedicated candle-making pitcher inside. Heat over medium heat.
Thermometer
Temperature control ensures your wax melts correctly:
- Kitchen Thermometer: Use it to monitor the wax temperature closely. For most wax types, melt between 180-185°F.
By gathering these essential supplies, you're well on your way to making your first home made candle. Next, we'll guide you through the step-by-step process to create your own candles at home.
Step-by-Step Guide to Making Your First Candle
Ready to dive into candle making? Follow these steps to create your first home made candle.
Melting Wax
- Prepare the Double Boiler: Fill your larger pot with water and place the smaller pot or pitcher inside. Heat over medium heat.
- Add Wax: Pour the wax flakes into the smaller pot. For beginners, soy wax is a great choice due to its ease of use and clean-burning properties.
- Monitor Temperature: Use your kitchen thermometer to ensure the wax melts between 180-185°F. Stir occasionally to help the wax melt evenly.
Securing Wicks
- Anchor the Wick: Secure the wick at the bottom of your container using a small amount of melted wax. Let it cool and harden to keep the wick in place.
- Keep the Wick Upright: Tape the wick to a horizontal chopstick or pen laid across the top of the container. This will keep the wick centered while you pour the wax.

Adding Scents
- Choose Your Scent: Essential oils and fragrance oils are popular choices. Essential oils offer natural, therapeutic benefits, while fragrance oils provide a stronger scent throw.
- Mix in the Oils: Once the wax reaches the desired temperature, remove it from heat and add your chosen oils. Use about 80-120 drops of essential oil for a strong scent. Stir well to evenly distribute the fragrance.
Pouring Wax
- Pour Carefully: Slowly pour the melted wax into your prepared container, ensuring the wick stays centered. Fill to just below the lip of the container.
- Avoid Spills: Pour over newspaper or a brown paper bag to catch any spills. Cleaning wax off surfaces can be a hassle, so this step is crucial.
Setting and Curing
- Let the Candle Cool: Place your candles in a cool location and let them set. This usually takes about an hour, but for best results, let them cure for at least 24 hours.
- Trim the Wick: Once the wax is fully set, trim the wick to about 1/4 inch. This prevents excessive smoke when burning.

By following these steps, you'll have your very own home made candle ready to light and enjoy. Next, let's explore how you can customize your candles for a unique touch.
Customizing Your Candles
Making home made candles is not just about creating a source of light; it's a way to express your creativity. Let's dive into how you can customize your candles to make them truly unique.
Soy vs. Beeswax
Soy Wax: - Pros: Soy wax is natural, burns cleanly, and is easy to work with. It holds fragrance well and produces minimal soot. - Cons: It can be more prone to frosting (a white crystalline layer) and may not have the same natural scent as beeswax.
Beeswax: - Pros: Beeswax has a natural honey scent, burns longer, and is less likely to crack. It's also a great choice for those who want a completely natural candle. - Cons: It’s typically more expensive and takes longer to melt compared to soy wax.
Scent Combinations
Choosing the right scent can transform your candle into an aromatic delight. Here are some popular combinations:
- Lavender and Eucalyptus: Perfect for relaxation.
- Peppermint and Rosemary: Great for a refreshing, invigorating scent.
- Cinnamon and Vanilla: Ideal for a cozy, warm atmosphere.
Pro Tip: Use about 60 drops of essential oil per 8-ounce candle for a balanced scent. If using fragrance oils, follow the manufacturer’s instructions for the best results.
Color Mixing
Adding color to your candles can make them visually appealing. Here are some tips:
- Liquid Dyes: Easy to mix, but be careful not to add too much, as it can affect the burn quality.
- Color Blocks: Solid and easy to control. Just shave off small pieces and melt them with your wax.
- Natural Dyes: For a natural option, you can use spices like turmeric for yellow or beetroot powder for red.
Container Choices
The container you choose can add character to your candle. Here are some options:
- Glass Jars: Mason jars, jam jars, or recycled candle jars are popular choices.
- Tin Cans: Lightweight and easy to decorate.
- Teacups: Perfect for a vintage look.
Eco-Friendly Tip: Reuse old containers to save money and reduce waste.
Decoration Ideas
Once your candle is set, you can add decorations to make it stand out:
- Dried Herbs and Flowers: Lavender, rose petals, or rosemary can be added for a natural touch.
- Labels and Tags: Create custom labels or tags to give your candles a professional look.
- Ribbons and Twine: Wrap a ribbon or twine around the container for a rustic finish.
By customizing your candles, you can create unique pieces that reflect your style and preferences. Whether you choose soy or beeswax, experiment with scents, colors, and containers to make your home made candles truly one-of-a-kind.
Next, let's look at some common candle-making mistakes and how to avoid them.
Common Candle Making Mistakes and How to Avoid Them
Even the best candle makers run into issues. Here are some common problems and how to fix them.
Overheating Wax
Why it happens: Wax can overheat if the temperature is too high or if it's left on the heat source for too long.
Fix it: Use a thermometer to monitor the wax temperature. For soy wax, keep it around 180-185°F. Overheating can cause discoloration and affect scent throw.
Improper Wick Sizing
Why it happens: Using the wrong wick size can lead to uneven burning and tunneling.
Fix it: Choose the right wick for your wax type and container size. Test different sizes to find the best fit. A wick that's too small won't melt the wax evenly, while a wick that's too big can create a large flame and soot.
Uneven Scent Distribution
Why it happens: Adding fragrance at the wrong temperature or not using enough can result in a weak scent throw.
Fix it: Add fragrance oils at the recommended temperature, usually around 185°F for soy wax. Measure your fragrance oil carefully—typically, 1 ounce per pound of wax works well. Let the candle cure for at least 24 hours before burning.
Cracking
Why it happens: Rapid cooling of the wax can cause cracks on the surface.
Fix it: Wrap the jars in a washcloth to keep the wax from cooling too fast. If cracks do appear, melt a bit more wax and fill them in.
Tunneling
Why it happens: The wick is too small, or the candle wasn't burned long enough the first time.
Fix it: Use a larger wick to ensure a full melt pool. Burn the candle long enough the first time so the wax melts across the entire top. This prevents tunneling in future burns.
By understanding and addressing these common issues, you'll be well on your way to making perfect homemade candles every time.
Next, let’s dive into some frequently asked questions about homemade candles.
Frequently Asked Questions about Homemade Candles
Is it cheaper to make your own candles?
Yes, making your own home made candles can be cheaper, especially if you prefer high-quality, natural ingredients. For example, a 16-ounce bag of beeswax costs about $13, and a 5-lb bag of soy flakes costs around $20. With these supplies, you can make multiple candles.
Let's break it down:
- Wax: 2 cups of wax = 1 8-ounce candle.
- Candle wicks: About $10 for a bulk pack.
- Containers: Reuse old jars or buy inexpensive ones from thrift stores.
- Fragrance oils: Prices vary, but they are generally cheaper than essential oils.
Overall, with a $20-30 investment, you can make many homemade candles. Compare this to store-bought natural candles, which can cost $20-30 each, and you see the savings add up quickly.
What are the best ingredients for candle making?
The best ingredients for candle making depend on your preferences for natural vs. synthetic materials. Here are some top choices:
- Wax: Soy wax and beeswax are popular for their natural properties. Soy wax holds fragrance well, while beeswax has a pleasant honey scent.
- Wicks: Cotton wicks are the most common and work well with both soy and beeswax.
- Fragrance Oils: These provide a stronger scent compared to essential oils. Follow the recommended dosage on the package.
- Essential Oils: While not as strong as fragrance oils, essential oils like lavender, eucalyptus, and peppermint are great natural options.
- Containers: Glass jars, tin cans, and ceramic containers are all good choices. Just make sure they are heat-resistant.
How do you make homemade candles smell good?
To make your homemade candles smell good, follow these tips:
- Use fragrance oils: They are designed for candles and provide a stronger scent than essential oils.
- Add fragrance at the right temperature: For soy wax, this is usually around 185°F. This helps the fragrance bind better with the wax.
- Use the right amount: Typically, 1 ounce of fragrance oil per pound of wax. Too little won't throw scent well, but too much can weigh down the wax.
- Let your candle cure: Allow the candle to sit for at least 24 hours before burning. This helps the scent to fully develop.
By using these tips, you can ensure your homemade candles smell amazing and fill your home with delightful aromas.
Next, we’ll conclude with some final thoughts on the creative possibilities of making your own candles.
Conclusion
Making your own home made candles offers endless creative possibilities. Whether you're crafting them for personal use, as gifts, or even for a small business, the potential for customization is vast. From choosing unique containers to experimenting with different scents and colors, every candle you make can be a reflection of your personal style and creativity.
One of the most exciting aspects of DIY candle making is the ability to tailor each candle to your preferences. You can create a cozy reading nook with candles that complement your favorite books or celebrate the seasons with holiday-themed scents. The combinations are limitless, allowing you to craft candles that are truly one-of-a-kind.
At Frostbeard Studio, we know the joy and satisfaction that comes from making something with your own hands. Our Book Lovers' Soy Candles are designed to enhance your reading experience, but the same principles apply to any candle you create at home. By using high-quality materials and paying attention to detail, you can make candles that not only look beautiful but also burn cleanly and safely.
The art of candle making is both rewarding and practical. It allows you to create a warm and inviting atmosphere in your home while also providing a creative outlet. So why not give it a try? Gather your supplies, follow our guides, and start experimenting. You might just discover a new favorite hobby and a deeper appreciation for the magic of handmade candles.
Happy candle making!